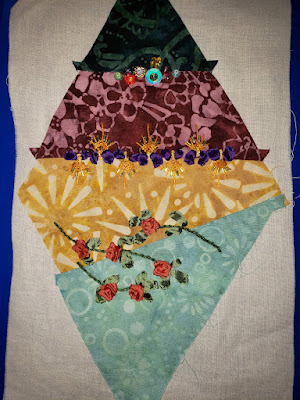
We have arrived at the "bling" part of our blocks. Beautiful Silk Ribbon Embroidery (SRE) and beads/sequins/etc. layered on top of the fiber embroidery just completed.
Here is now Block #11 (which you saw me construct at the last post) now looks. If you compare the elements in the book photo (see page 59) you will note some minor changes. Well, the most obvious is that these colors are not the same as was used in the "Spring" inspired quilt in the book.
Sorry this seam is vertical...can't rotate it. But, you should note that I've chosen to add some light green bugle beads between the spokes in the center seam.The bottom seam, more like branches or vines...is short one rose. I rant out of the orange 7mm silk ribbon. But, I'm okay with it not being there as no one else will think it is short. I might come back later and put a small butterfly charm near the spot where this last rose is diagrammed it. (see page 58 in the book)
Lastly, I substituted beads, sequins and a tiny glass butterfly bead for buttons in the top seam. This block was embellished last week, while I was attending a Retreat with friends. While I brought plenty of beads with me...not a single button made it into my car!
The next task is for me to finish embellishing all of my blocks (and sewing together a few as well). As that is done, I'll post more photos.
Lastly, we will piece all of these finished blocks together following the piecing diagram (see pages 12-13). Blocks can be sewn together in two ways: (a) traditional with a quarter-inch seam allowance (but use a zipper foot to help prevent you ''running over" any sewn on beads, or (b) butt blocks together and "zig zag" down the center, catching both edges at the same time. The second option will require that you cover the butted-seam with lace, ribbon, bias binding, etc. to finish the top.
Borders can be added, these are attached just as you would any other quilt. Crazy quilts do not contain batting; but you will attach a "faux backing" to hide all of the embroidery and beading work on the back of your foundation piecing blocks.
I hope you will share photos with me when your project is complete!


No comments:
Post a Comment
Your comments make me smile! All comments are moderated, so they will not appear immediately.
Kathy